
How to Brown Mince for Cottage Pie Without Steaming It
By Michael
Browning mince sounds too simple to need its own guide, yet it decides much of the flavour in a cottage pie. Done well, the beef colours deeply and the gravy begins with savoury, roasted edges. Done badly, the meat turns grey in a puddle of liquid and the filling tastes boiled rather than fried.
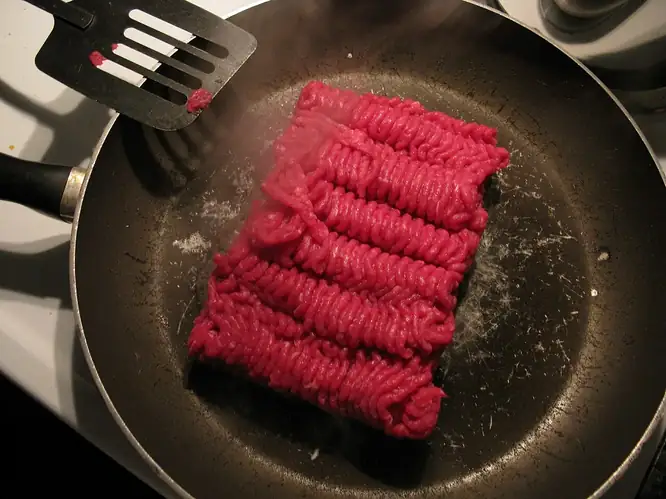
Why mince steams instead of browning
Raw mince contains a great deal of water. When it hits the pan, some comes out almost at once, along with juices released as the meat warms. If there is room for the liquid to evaporate and the pan stays hot, the surface dries and colours. If the mince is piled deeply or the pan cools under a large cold load, the liquid collects faster than it can escape. The meat then sits in its own juices and effectively steams.
That difference matters because colour brings flavour. A browned surface tastes richer and more savoury, while steamed mince can remain bland even after stock, tomato purée and Worcestershire sauce are added. Gravy cannot retrospectively create the flavour that should have been built at the start. In our cottage pie recipe, browning is the first real cooking step, so it deserves attention.
Do not simply use the fiercest heat and stir frantically. That can scorch small pieces while the middle remains wet. You need three things together: a hot pan, space around the meat and patience before you start breaking it apart.
Choose a pan that gives the mince room
A wide frying pan or sauté pan is the best tool for 500g of mince. The meat should spread into a loose layer with some pan surface still visible. A few pieces can touch, but it should not form a solid mound. A heavy-based pan helps because it holds its heat when the cold mince goes in.
For the tested recipe, start with the recipe's 1 tbsp of sunflower or vegetable oil and let the pan become properly hot. The oil should shimmer and move easily. If it is smoking heavily, lift the pan off the heat briefly; burnt oil will spoil the filling. If it sits in a cool pool, wait a moment longer.
Pan size is the point many cooks miss. A standard wide pan can usually take the full 500g if the layer is shallow. A small pan cannot, no matter how high the heat is. Divide the mince into two lots of roughly 250g. Brown the first, lift it into a bowl, then brown the second before returning everything to the pan. Two properly coloured lots taste better than one large grey one.
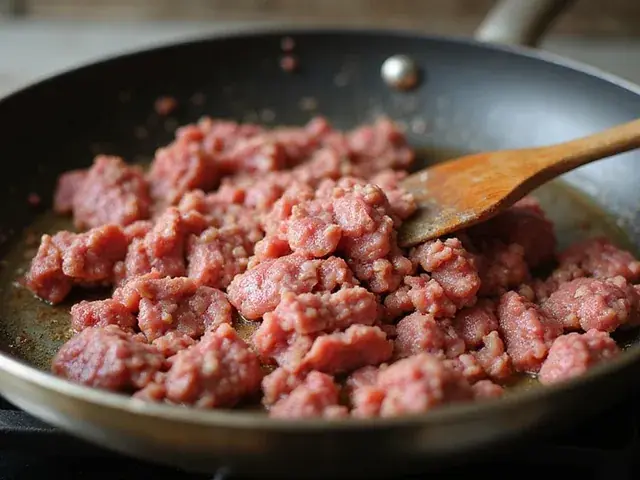
The browning sequence, step by step
First, add the mince and spread it out. Loosen the block if it came from the packet in a tight slab, then spread it across the hot pan. Do not press it down firmly. Pressing squeezes out more juice and compacts the layer, which is the opposite of what you want.
Second, leave it alone. Let the underside cook undisturbed for roughly 2 to 3 minutes (estimate), depending on the pan and hob. During that time the meat touching the metal dries and colours. If you stir immediately, you mix wet surfaces back into the pan and keep resetting the process.
Third, turn it in sections. Slide a spatula or wooden spoon underneath and flip the mince over in a few broad pieces. You should see a coloured underside, not merely meat that has changed from pink to pale grey. Some pieces will be deep brown, others lighter; that unevenness is fine.
Fourth, break it up. Once a crust has begun to form, use the edge of a wooden spoon to separate the mince into small pieces. Larger pieces colour better at the start, and once firmer they are easier to reduce without turning them into wet crumbs.
Fifth, cook off the liquid. More juice may appear as the mince is broken up. Keep the heat up and stir now and then, spreading the meat out so moisture can evaporate. At first the pan sounds wet and bubbling. When the mince is nearly ready, the sound changes to a clearer sizzle and the meat fries in the fat left in the pan. This often takes another 3 to 5 minutes (estimate), but look and sound are better guides than a timer.
Finally, check the largest pieces. Break one open. It should not be pink in the centre. The outside should include plenty of genuinely brown areas and darker edges, not just an even beige colour. A few very dark flecks are welcome; blackened, bitter crumbs mean the mince was left too long once it had dried.
How to know when it is properly browned
Colour is the first sign. Properly browned mince is not uniform. It has deep brown patches, crisp-looking edges and some pieces that have caught more than others. If the whole pan is a flat grey-brown, it has cooked through but probably has not browned much. If it is still pink in patches, it needs more time.
The pan is the second sign. At the start there may be a pool of liquid. By the end, it should have reduced until the mince is glossy with fat rather than sitting in watery juice. Juices pressed from a large piece should run mostly clear rather than pink. You do not need a completely dry pan — the vegetables will add moisture — but liquid should no longer slosh from side to side.
Smell and texture help too. Browned beef smells savoury and roasted; steamed beef smells comparatively flat and boiled. The mince should also be in separate small pieces, not one rubbery sheet or a pan of mush. Pieces that begin firm and distinct hold their shape better when they simmer in 400ml of hot beef stock and sit under the mash.
What happens after the mince has coloured
In the tested recipe, the browned mince is followed by 1 large onion, finely chopped, 2 carrots, finely diced, 2 celery sticks, also finely chopped, and 2 garlic cloves. The vegetables soften in the same pan and pick up the browned residue left by the beef. Do not wipe the pan clean between stages. As the vegetables release a little moisture, they loosen those savoury bits and carry the flavour through the filling.
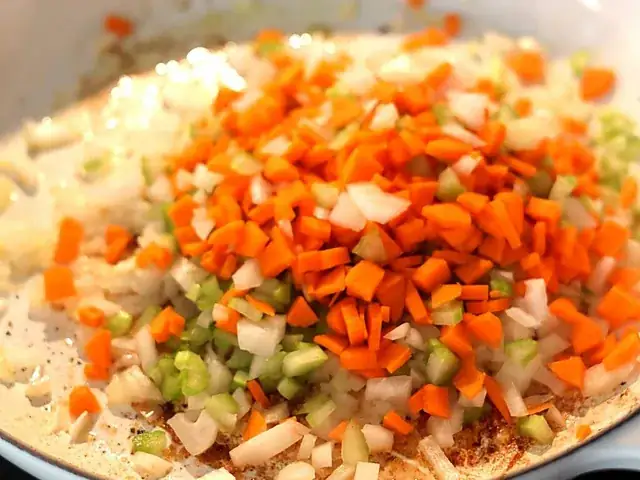
Garlic goes in briefly so it does not scorch, then the recipe uses 1 tbsp of plain flour, 2 tbsp of tomato purée, 1 tbsp of Worcestershire sauce, the hot stock, 1 tsp of dried thyme and a bay leaf. Frozen peas are stirred through near the end. If the mince was properly browned, those ingredients build on a strong base instead of doing all the work themselves.
Common browning mistakes
| Mistake | What happens | The fix |
|---|---|---|
| Adding all the mince to a small pan | The layer is too deep, liquid collects and the beef steams before it can colour. | Use a wider pan, or brown 500g in two lots and combine them afterwards. |
| Stirring from the first second | Wet surfaces keep moving, the pan stays full of juice and no crust forms. | Spread the mince out and leave the underside undisturbed for roughly 2 to 3 minutes (estimate). |
| Breaking the mince too small, too early | Tiny wet crumbs release liquid across the pan and cook to a grey mush. | Let larger sections colour first, then break them down with the edge of a spoon. |
| Using a pan that is not hot enough | The mince warms slowly, leaks juice and boils gently instead of frying. | Heat the oil until it shimmers before the beef goes in; keep the heat up while liquid evaporates. |
| Stopping as soon as the pink disappears | The meat is cooked but pale, with little roasted flavour for the gravy. | Continue until there are deep brown patches, crusty edges and only a glossy film of fat in the pan. |
| Leaving it too long once dry | Small pieces scorch, turn bitter and harden before the filling is even made. | Once the liquid has gone and the colour is deep, stir more often and move on to the vegetables. |
Should you drain the fat or keep it?
The answer depends on how much fat is in the pan after browning. Fat is not automatically the enemy. Some coats the mince, carries flavour and combines with the flour to make the base of the gravy. If there is just a glossy layer and a little collecting at one side when you tilt the pan, keep it and carry on.
If there is a distinct pool — enough to leave the finished gravy greasy — spoon some off after browning. Tilt the pan, let the fat run to one side and remove the excess. Leave a little behind. A completely drained pan can make the vegetables catch and the flour clump.
Very lean mince may release little fat. The oil already in the tested recipe should then be enough, provided the mince is spread out and the pan was hot. If it sticks before it colours, resist scraping at it constantly; meat often releases more easily once the underside has formed a crust. A small extra drizzle of oil is a practical adjustment for a dry, lean batch, but it is not part of the tested quantities.
Browning a kilo for a double pie
The same rule becomes even more important when you double the filling. One kilogram of mince in a domestic pan is almost guaranteed to steam unless the pan is exceptionally wide. Work in two or three lots, giving each one room and time to colour, then return all the mince to the pan before adding the vegetables. Our guide to batch-cooking cottage pie covers the quantities, dishes and storage side of making a double batch.
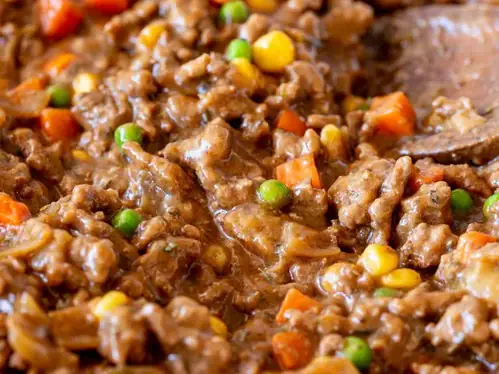
The tested recipe this technique belongs to
This is the opening technique for the site's kitchen-tested recipe, made with 500g of beef mince, the vegetables listed above, 400ml of hot beef stock and a mash of 900g of floury potatoes, 50g of butter and about 75ml of warm milk. The pie fills a dish of about 2.5 to 3 litres, roughly 20 × 30 cm.
Once assembled, it bakes at 200°C conventional / 180°C fan / Gas Mark 6 for 25 to 30 minutes and rests for 5 to 10 minutes. Those are the tested recipe's oven figures. The browning times in this guide are practical estimates because hobs and pans vary; judge by colour, dryness in the pan and the absence of pink.
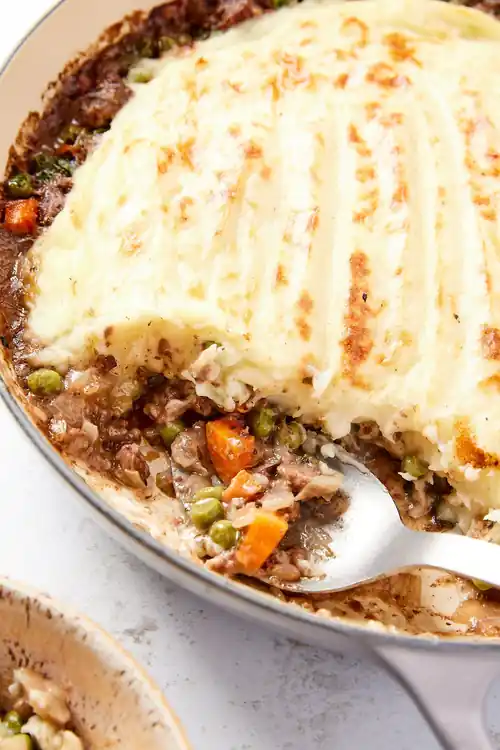
The method is straightforward: hot pan, shallow layer, no early stirring, break the mince up late and cook the liquid away. The gravy then starts with beef flavour already in place.
Questions people ask
Yes, if the pan is wide enough for the mince to sit in a loose, shallow layer. If the mince forms a deep mound or the pan fills with liquid, split it into two lots of about 250g, brown each separately and combine them before adding the vegetables.
Mince naturally contains water, and more is released as it heats. A crowded pan, a pan that was not hot enough and constant early stirring all make the problem worse because the liquid cannot evaporate. Spread the mince out, leave it undisturbed at first and keep cooking until the pan changes from wet bubbling to a clearer sizzle.
Break it up after the underside has had time to colour. Larger sections brown more effectively than tiny wet crumbs. Once you can see a coloured crust, flip the mince in pieces and use the edge of a wooden spoon to separate it into the size you want for the filling.
Look for plenty of deep brown patches and darker, crusty edges, with no pink remaining when the largest piece is broken open. The mince should be glossy with fat rather than sitting in watery liquid, and the juices from a large piece should run mostly clear. Even grey-brown is cooked, but it will not give the gravy the same flavour.
No. Keep a little fat, because it carries flavour and helps the flour form the gravy. If there is a clear pool in the pan, tilt it and spoon off the excess after browning. If there is only a glossy film, leave it alone. Very lean mince may need no draining at all.
No. It is a handling technique, not a change to the ingredients or quantities. Brown each lot properly, return all the mince to the pan, then continue with the onion, carrot, celery and the rest of the tested method. The same approach is useful for a double batch, where crowding is even more likely.