How to Get a Golden, Crisp Cottage Pie Topping
By Michael
A cottage pie can taste exactly right and still come out of the oven looking pale and soft on top. The colour and the crunch are decided in the last few steps: how the mash is forked, what sits on the surface, and how the heat reaches it. This guide works through the finish in order, using the bake from the tested recipe as the reference point.
Why ridges brown and a flat top does not
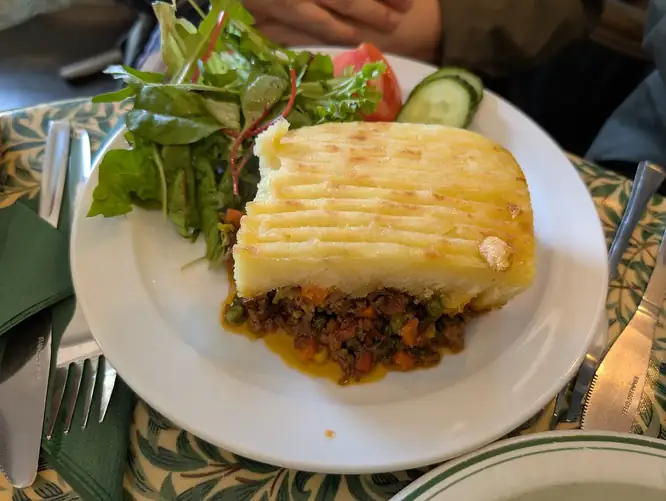
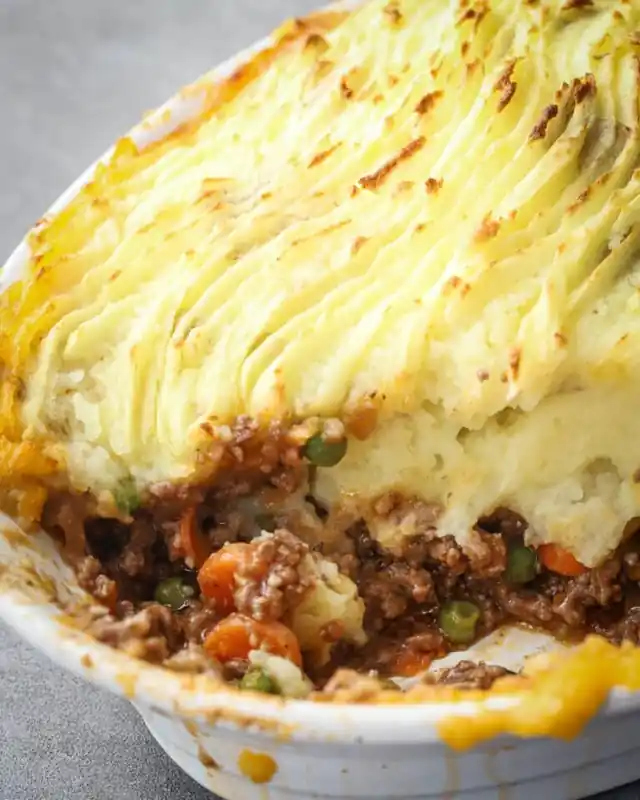
An oven colours food from the surface inwards, and it colours dry surfaces far faster than wet ones. A fork ridge is a thin edge of mash with air on both sides. It dries out quickly in the heat, and dry potato turns golden. The valleys between the ridges stay softer and paler, and that contrast — crisp, coloured peaks over a soft topping — is exactly what a good cottage pie top looks and feels like.
A smoothed top works against you. Pressed flat with the back of a spoon, the mash becomes one wide, even surface with no thin edges anywhere. It all dries at the same slow rate, so by the time the filling is bubbling and the pie is ready to come out, the top has barely started to colour. The pie is cooked, but it looks anaemic and eats soft right through. Nothing has gone wrong with the cooking; the surface simply gave the heat nothing to work on.
Fork ridges: the step that does most of the work
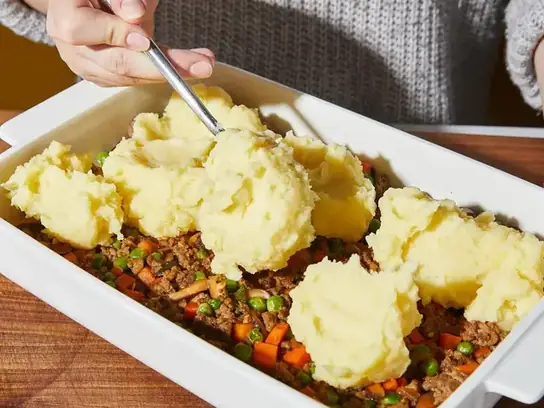
Start by spreading the mash over the filling in spoonfuls, edge to edge, so the filling is sealed in. Then take a fork and draw the tines through the mash, lifting slightly as you pull, so each stroke leaves a raised ridge behind it. Work across the whole dish in one direction, or cross-hatch in two directions if you like the look. Press lightly — you are combing the surface, not ploughing it.
A few details matter. Make the ridges over the whole top, including the centre, which is the part furthest from the dish's hot edges and the last to colour. Take the forking right to the rim so there is no flat border. And keep the pressure gentle: push too hard and the fork drags mash down into the filling, which gives you a sunken patch instead of a ridge. If a little filling bubbles up through a thin spot during baking, that is nothing to worry about — it happens on most home-made pies and colours nicely itself.
Rough it up; do not smooth it down
If forking feels fiddly, the alternative is cruder and nearly as good: dab and lift the surface with the back of a spoon so it stands in rough peaks and crags instead of lying flat. Either way, the rule is the same — the finished pie going into the oven should look rougher than you think it needs to. Peaks settle a little as they bake, so what looks overdone raw ends up about right cooked.
What you want to avoid is the baker's instinct to neaten. A palette-knife finish belongs on a cake. On a cottage pie it wipes out the texture the oven needs, and it tends to drag the mash into a thin, even layer that colours slowly. Rough first, neat never: if a patch still looks smooth once you have finished, go back over it with the fork before the dish goes in.
Butter on top: dots or brushed
The mash in our cottage pie recipe already contains 50g of butter, worked in before the milk. A little more on the surface is a finishing habit rather than part of the tested card, and it earns its place: butter on the peaks helps them colour evenly and crisp rather than dry out. Sit small dots of butter across the ridges, or brush the top lightly with melted butter so it reaches into the grooves.
Go easy. The butter should coat the peaks, not pool in the valleys — pooled butter softens the very ridges you have just made and can fry the edges of the topping while the middle stays soft. A light hand, spread evenly, is the whole technique.
The cheese option
The tested recipe lists 50g of mature Cheddar as an optional extra, to scatter over the top before baking. Cheese is the fastest route to colour: it melts into the ridges, browns at the edges and crisps where it catches the heat, giving you a lid that is golden even in the valleys where plain mash stays pale. Keep the ridges underneath it — cheese over a flat top melts into a flat sheet, while cheese over ridges crisps in patches, which is far better to eat.
Because cheese colours quickly, it also catches quickly. Check the pie a few minutes before the end of the bake and judge it by eye: deep gold is ready, darkening edges mean it has had enough. For the cheese route in full — including stirring Cheddar through the mash itself, and how to stop it turning greasy — see our guide to cottage pie with cheesy mash.
The grill finish, when the bake is not quite there
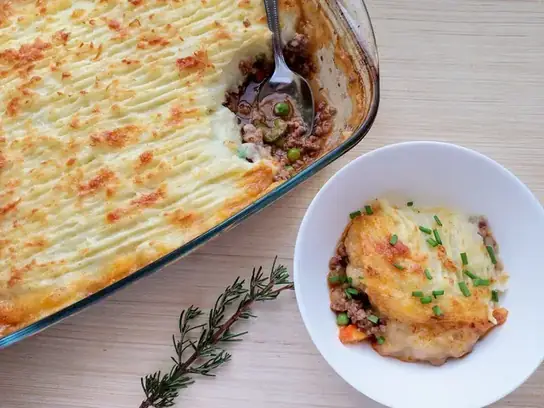
Every so often a pie comes to the end of its bake hot through, bubbling at the edges, but with a top that is a shade paler than you want. The filling is done and cooking it longer will only dry it out, so the fix is direct top heat: a short spell under a hot grill. This is guidance rather than part of the tested recipe, and it needs your full attention — put the dish under a preheated grill for a few minutes (estimate) and watch it constantly. Ridges and cheese colour in seconds once they start, and the line between deep gold and scorched is a short one.
Keep the dish a sensible distance from the element — too close and the peaks catch before the rest colours — and turn the dish once if one side is racing ahead. Then rest the pie as usual. Used this way, the grill is a rescue for a pale top, not a routine step: with ridges, a hot oven and the full bake, most pies never need it.
The techniques at a glance
| Technique | What it does | Watch out for |
|---|---|---|
| Fork ridges | Thin edges of mash dry and brown in the oven heat | Pressing too hard pushes mash down into the filling |
| Roughing up with a spoon | Peaks and crags colour unevenly, in a good way | Any patch left flat will stay pale |
| Butter dots or brushed butter | Helps the peaks colour evenly and crisp | Too much pools in the valleys and softens them |
| Cheddar over the top | Browns quickly and crisps at the edges | It colours fast — check before the timer ends |
| Grill finish | Fast, direct top heat for a pale lid | Never walk away; a few minutes (estimate) is enough |
Why the top sometimes stays pale
When a pie refuses to colour, one of three things is usually behind it. The first is a wet mash surface. Mash made from potatoes that were not drained and steam-dried carries extra water, and that water has to steam off before any browning can start — on a short bake, the top spends its whole oven time drying instead of colouring. The fix is upstream: drain the potatoes thoroughly and let them steam dry in the hot pan before mashing.
The second is an oven that is not fully hot. A pie put into an oven still climbing to temperature loses the strongest part of its bake, and a topping that needed the full 25 to 30 minutes at full heat ends up underdone on top even though the filling is cooked. Preheat properly and wait for the oven to reach temperature before the dish goes in. The third is where the dish sits: a pie on a low shelf, well below the oven's top heat, colours slowly. Bake on the middle shelf, and if your oven runs hot at the top, that is no bad thing for this one dish.
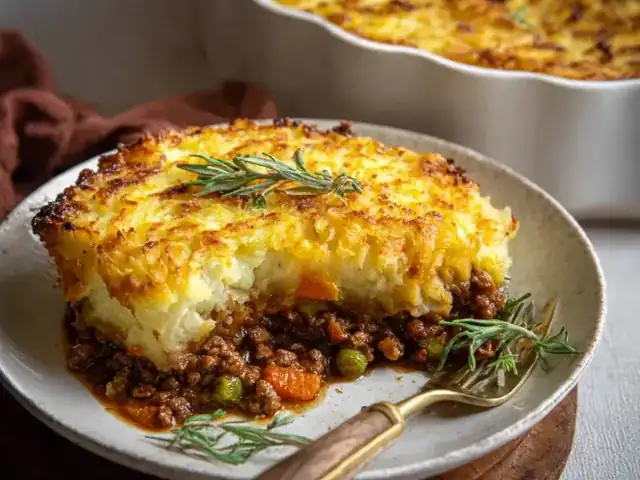
The tested bake, as the reference
Everything above hangs off one reliable bake. In the tested recipe the assembled pie — a dish of about 2.5 to 3 litres — bakes at 200°C conventional, 180°C fan, Gas Mark 6, for 25 to 30 minutes, until the top is golden and the filling is bubbling at the edges. That timing was kitchen-tested with a plain forked top, and it is long enough to colour ridged mash properly in a hot oven. Cheese on top will often be ready at the earlier end of the range; a plain top may want the full half hour.
Rest the pie for 5 to 10 minutes before serving. The rest lets the filling settle so portions hold together, and it does not cost the top its crispness — just leave the dish uncovered, because a lid or tight foil traps steam against the ridges and softens them. Ovens vary, so treat the colour as the real test: golden peaks, paler valleys, bubbling edges. When you see that, the finish is right, whatever the clock says.
Questions people ask
No. Fork ridges, a rough surface and a properly hot oven brown plain mash perfectly well, and the tested recipe's bake was timed on a plain forked top. The 50g of mature Cheddar on the recipe card is an optional extra that colours faster and crisps at the edges — a different finish, not a necessary one.
The middle of the dish is furthest from the hot edges of the dish itself, so it colours last. It usually means the ridges in the centre were pressed flatter than the ones round the rim, or the fork never quite reached there. Fork the centre as thoroughly as the edges, and make sure the oven is fully preheated before the pie goes in.
Yes — the grill is only a rescue for a pale finish. Ridges with plenty of surface texture, a light coating of butter or the optional Cheddar, and the full 25 to 30 minutes at 200°C (180°C fan, Gas Mark 6) will give you a golden, crisp top from the oven bake alone, which is how the tested recipe does it.
Both, in different places. The mash itself should be smooth and spreadable so it seals the filling in an even layer. The very surface of that layer should then be roughed up with a fork or spoon. Smooth underneath for structure, rough on top for browning — they are two stages of the same topping, not a choice between them.
Only a few minutes (estimate) under a hot, preheated grill, and it must be watched the whole time. Ridges and cheese go from pale to deep gold very quickly under direct heat, and they keep darkening for a moment after the dish comes out. Treat it as a finishing rescue, not a set stage — the tested recipe colours its top in the oven bake alone.
Not in the 5 to 10 minutes the tested recipe allows, provided the pie rests uncovered. The top stays crisp while the filling settles. What softens a topping is trapped steam, so do not cover the dish tightly with foil or a lid while it rests — if you need to keep it warm for longer, leave any cover loose so the steam can escape.